
Data Services is use to migrate the data from one Data base to another Database. This is an ETL tool used to
Extract, Transform and Load the data from source to target systems.
Extract, Transform and Load the data from source to target systems.
Data services will not hold even a single record of data ( Its not a warehouse). So to hold the data that is
extracted or transformed we need to have a DB at the back end. we use SQL server as the back end database.
extracted or transformed we need to have a DB at the back end. we use SQL server as the back end database.
Setting Up the System:-
The below are the basic fundamental steps you need to follow when setting up a Data services system.
1. Create a DB in SQL ( or any supporting back end DB)
2. Create a Repository (Local, Central or Profiler)
3. Assigning the Repository (Management Console)
4. Defining the Job server ( Server Manager)
5. Starting with the Designer ( Data services Designer
1. Create a DB in SQL ( or any supporting back end DB)
2. Create a Repository (Local, Central or Profiler)
3. Assigning the Repository (Management Console)
4. Defining the Job server ( Server Manager)
5. Starting with the Designer ( Data services Designer
I. First step is you need to create a database on the SQL side so that it will contain all the Intermediate
information like temp tables (simple which will do a one to one mapping or the temp tables which will handle
the transformed data)You can create a separate user id and password for the DB so that you can use the
same ID & PWD when you login to the Data services Designer.See the following screen shots to understand
how you create your database.
same ID & PWD when you login to the Data services Designer.See the following screen shots to understand
how you create your database.
Steps:-
Login to SQL management studio
Navigation :- Start → Program Files → Microsoft SQL Server 2005 →SQL Server Management Studio Express
Give in the Credentials
Authentication :- SQL Server Authentication
Login :- sa
Password :- sa123 click on connect.
Now you will be in SQL Server Management Studio.
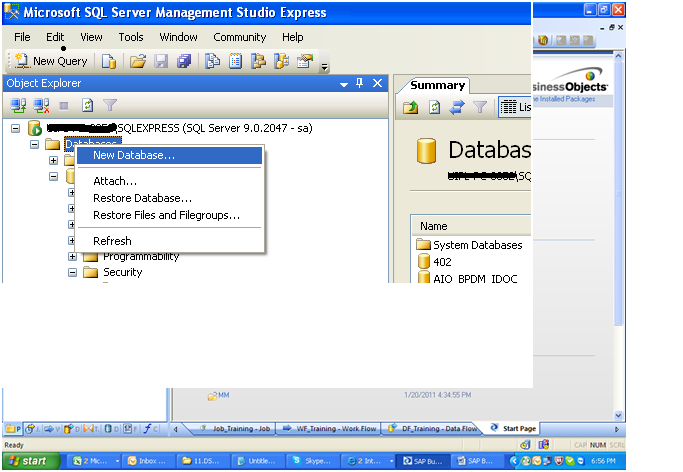
Now select the Data base folder on the left hand side → Right click → New Database
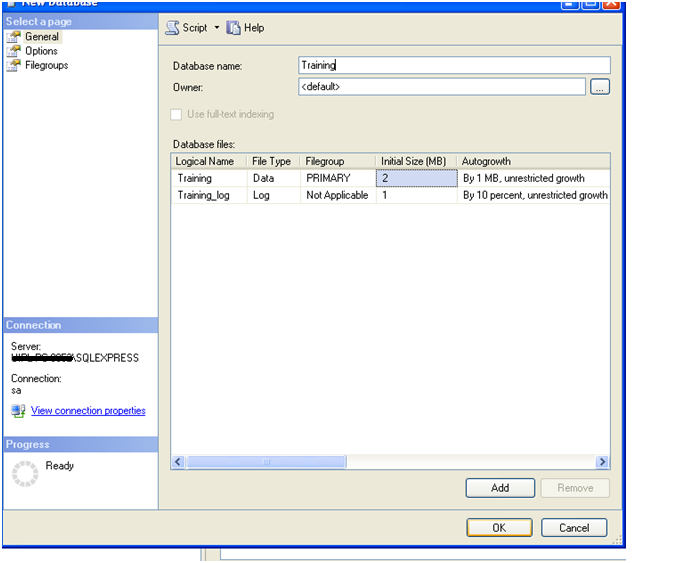
Give the Database name “ Training” and click on OK
If you want to change the login ID and password of that DB .
Open the Security Folder under the Database folder.
Select the Security Folder → right click→ new→ login→ you will get the below window
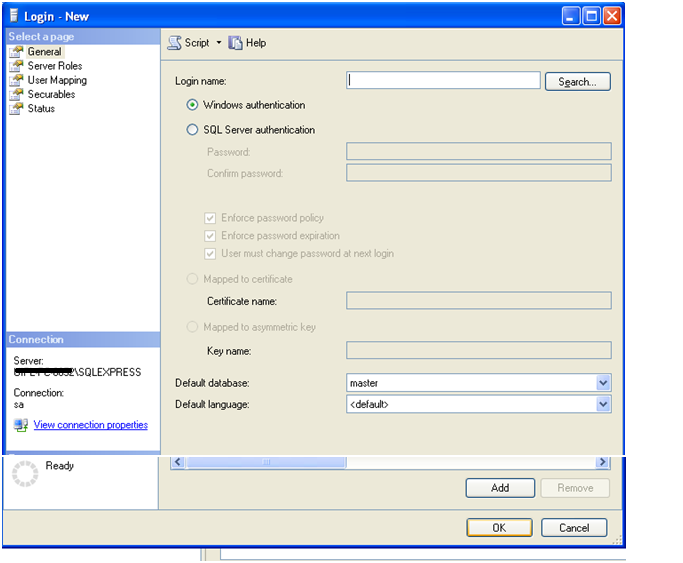
Give the Login name for ex:- sam
Select the SQL Server Authentication radio button.
Give the new password “ sam123”
Confirm the password “sam123”
Uncheck the Enforce password policy ( the remaining two also will be unchecked)
Select the default database to “Training” using the Dropdown button available.
Next if you look at the left hand side of the same window you will find
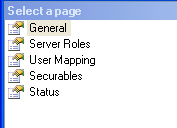
Now select the server roles and check system admin on the right hand side.
Next click on the User mapping
Check the database you created in the right side top portion of the window and
check public and db_owner on the bottom part of the Window.
check public and db_owner on the bottom part of the Window.
Now click on ok and the User name with password will be created for the Database you created.
II. Create a repository on the Data services side
II. Create a repository on the Data services side
We have 3 types of repositories in data services
1. Local Repository
2. Central Repository
3. Profiler Repository
1. Local Repository
2. Central Repository
3. Profiler Repository
Local repository is used for a single user instance. This repository Is created locally in your system and the
user who login to this system can access the local repository. (Its local to the system)(Local repository holds
all the Jobs, workflows, data flows, data stores and functions of the local user)
user who login to this system can access the local repository. (Its local to the system)(Local repository holds
all the Jobs, workflows, data flows, data stores and functions of the local user)
Central Repository is used for the Multiple user instance. This repository is created centrally and it can be
used or accessed by multiple users and user groups that are created for this project. Using the Central repo
you can share your jobs and Data services components across the multiple users.This acts as a central storage
place so that all the users can upload and download (share) the Data services artifacts.
Profiler Repository is used to do the data profiler activities like data cleansing and consolidation.
Data Quality aspects are carried out using the Profiler repository. This holds the reports that were generated
when we do a data quality to check the health of the data.
Data Quality aspects are carried out using the Profiler repository. This holds the reports that were generated
when we do a data quality to check the health of the data.
Navigation:-
Start → Program Files → SAP BusinessObjects XI 3.2 → SAP BusinessObjects Data Services →
Data Services Repository Manager
Data Services Repository Manager
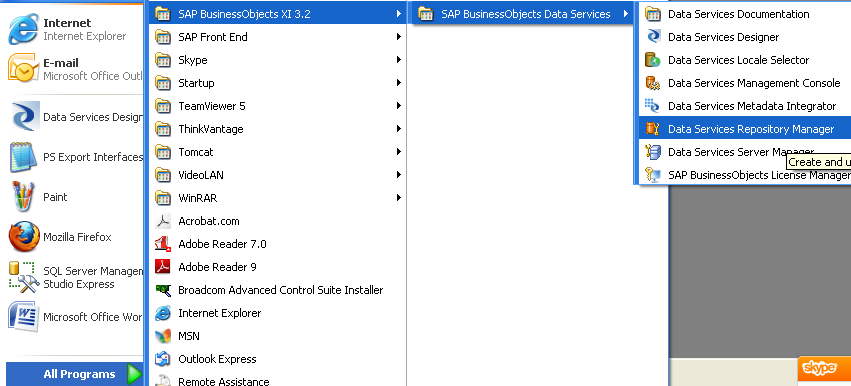
You will get the below screen
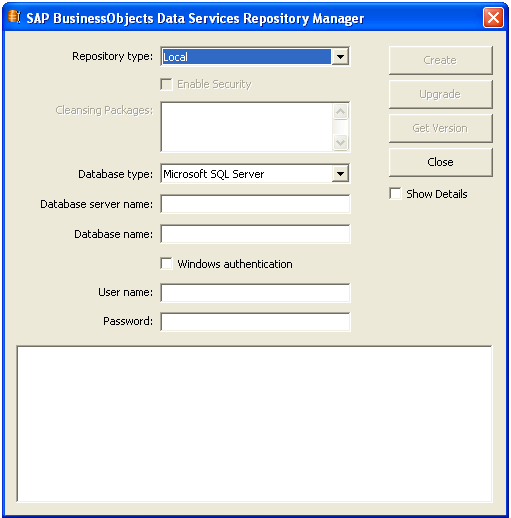
Using the drop down menu select the repository type as “ Local”
Database Type :- Microsoft SQL Server
Database Server name : Give the SQL server name here.
Database name : Training
User name: sam
Password: sam123
Now click on Create button and your local repository will be created.
III. Assign the Repository to Data services using Management Console
III. Assign the Repository to Data services using Management Console
You need to assign the created repository to the data services .
Now login to the Dataservices Management console using the following Navigation.
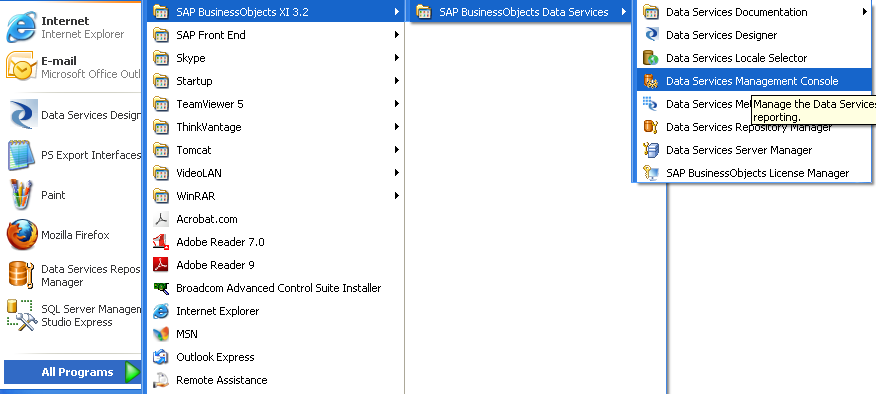
Management Console is a web based tool.
This is more of a kind of Administration tool that is used to create and maintain the repositories, add the
repositories, Create the User Groups and Users and also used to schedule and execute the jobs.
repositories, Create the User Groups and Users and also used to schedule and execute the jobs.
Since it is a web based tool, it can be accessed from any location and the administrator / user can access
it from any remote location and perform the tasks.
it from any remote location and perform the tasks.
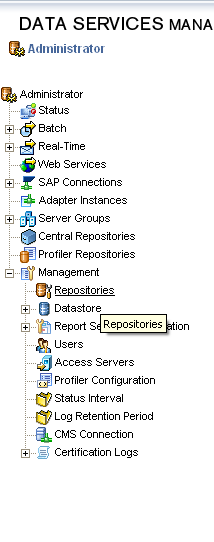
Login using the User id and password as “admin”
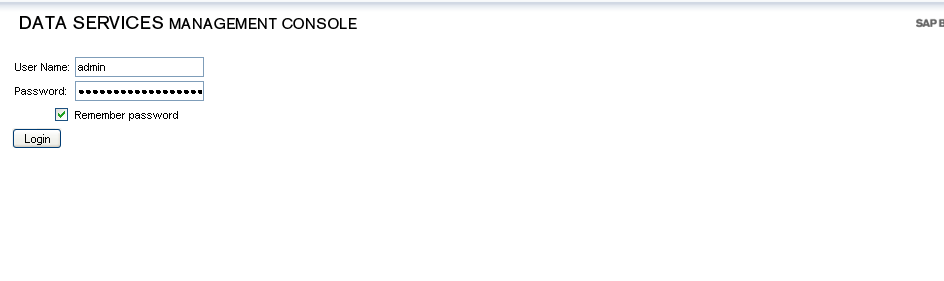
Now you will find
Click on the Administrator.
now click on Repositories and click on ADD on the right side to add the local repository that you created.

Give the above credentials
Repository Name : Local Repo
Database type : Microsoft SQL Server
Machine Name: SQL server Name
Database Name : Training
User name : sam
Password: sam123
Now click on test button and see if the above credentials entered were correct and click on Apply.
Now you assigned the local repository to the data services.
IV. Defining the Job serer is a one time job and you can define multiple job servers per repository or if required. Job server is used to execute the jobs that you build using the Data services.
To create the or define the job server see the below navigation
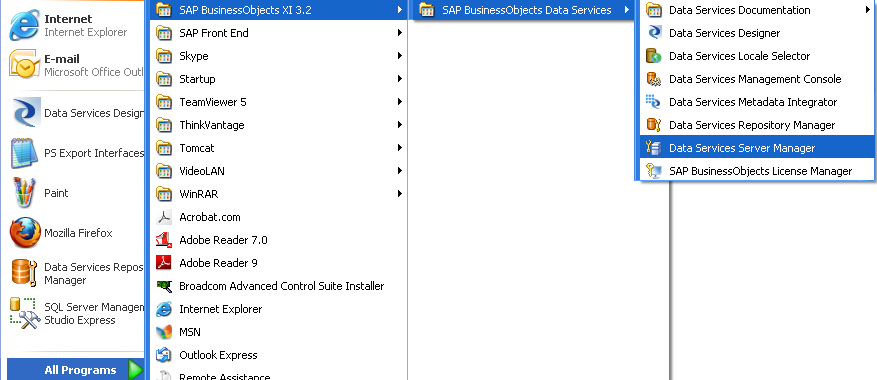
You will get the below screen

Click on “Edit job configuration server “

You will find the list of the job serves (and their port numbers) available.
If you want to add a new job server click on add.
You will get the below screen

Give the job server name :- Job_server_training
Job server port :- 3507 ( this port number should be unique per job server so please cross check with the
port numbers that available and use a new port number)
port numbers that available and use a new port number)
Click on Add on the right side and now the Repository Information pane will be active.
Give the Data base Type : Microsoft SQl Server
Server name : SQL Server name
Database name: training
User name : sam
Password : sam123
Click on Apply, click on ok.
Again click on Ok and once you come to the main job server page click on restart button at the last.
Again click on Ok and once you come to the main job server page click on restart button at the last.
This will restart the services so that the newly created job server will be set as the default server.
This is how you will create the job server.
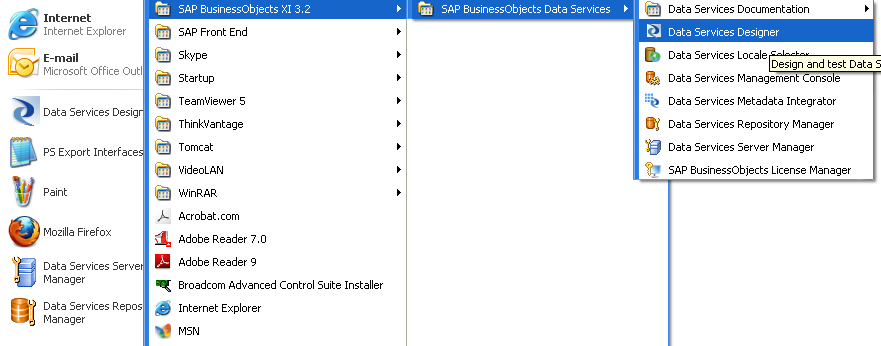
V. Starting with the Data services Designer
This is how you will create the job server.
V. Starting with the Data services Designer
Data services designer is used to connect to the source and target system, extract the data, build
the job to apply the business rules on the field level data that is extracted and send the data to the
target system. Its once place where you can perform from simple one to one mapping query transform
to complex query transforms like Global address cleansing, Table compressions and so on.
the job to apply the business rules on the field level data that is extracted and send the data to the
target system. Its once place where you can perform from simple one to one mapping query transform
to complex query transforms like Global address cleansing, Table compressions and so on.
See the below navigation
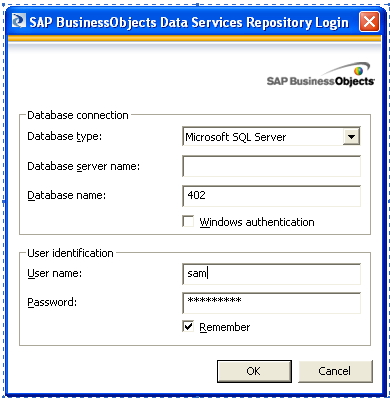
Give the credentials
Database type : Microsoft Sql server
Database server name : SQL server name
Database name : Training
User name : sam
Password : sam123
Make sure that the windows authentication is unchecked.
Click on OK and now you will login to the designer designer window/canvas
Click on OK and now you will login to the designer designer window/canvas
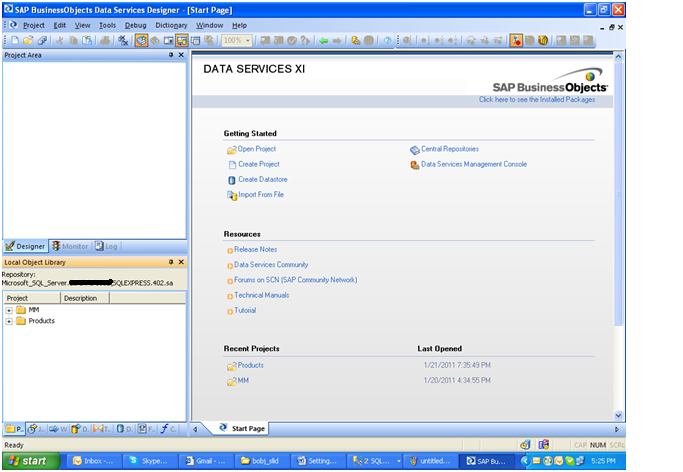
Designer is broadly divided in to 3 regions.
Project Area:
( Contains all the projects that you build and displayed in a hierarchical way like Project, script, conditions, work flows, data flows)
( Contains all the projects that you build and displayed in a hierarchical way like Project, script, conditions, work flows, data flows)
Local Object library :
( has the tabs like Project, Job, Work Flow, Dataflow, Transformations, Datastores, formats and functions )
Designer window is used to design or build the job.
( has the tabs like Project, Job, Work Flow, Dataflow, Transformations, Datastores, formats and functions )
Designer window is used to design or build the job.
First we need to connect or establish a connection between our designer and data base
(source, target or staging) this can be done using the data stores.
(source, target or staging) this can be done using the data stores.
Data store is present as a tab under the local object library and this is used to establish connection between
the data services and any other (source or target) Systems.
the data services and any other (source or target) Systems.
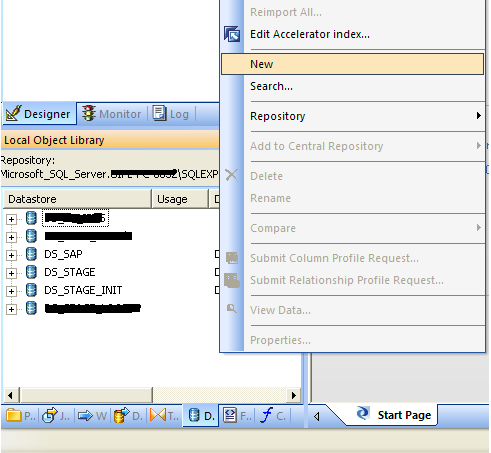
Go to Data store and right click in local object library and click on new.
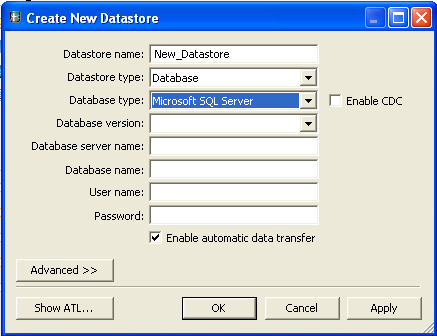
Give in the credentials
Data store Name : DS_Staging
Datastore Type : Database
Database Type: Microsoft SQL server
Database version: SQL server 2005
Database server name: SQL server name
Database name : Training
User name: sam
Password: sam123
Click on apply and click on OK
Now your data store will be created under the data store tab under the Local Object library.
Now you established a connection between the local db and Data services.
Now you established a connection between the local db and Data services.
Extracting a Flat file data and loading the data to the database (SQL)
In this scenario we are creating job which will load the data from a flat file to SQL DB.
Create a flat file and fill it with data.
Cust No
|
Cust Name
|
Add
|
Phone No
|
Region
|
Country
|
Now save the spread sheet on your desktop.
Make sure that you save that in Excell 97-2003 work book (*.xls) type as the
Data service can only load the data from XLS not XLSX.
Now your data source (Flat file ) is ready and you need to call that sheet to the data services.
Since it’s a flat file you can directly call that to the data services using File format tab
under local object library instead of building a Data store for connection.
Since it’s a flat file you can directly call that to the data services using File format tab
under local object library instead of building a Data store for connection.
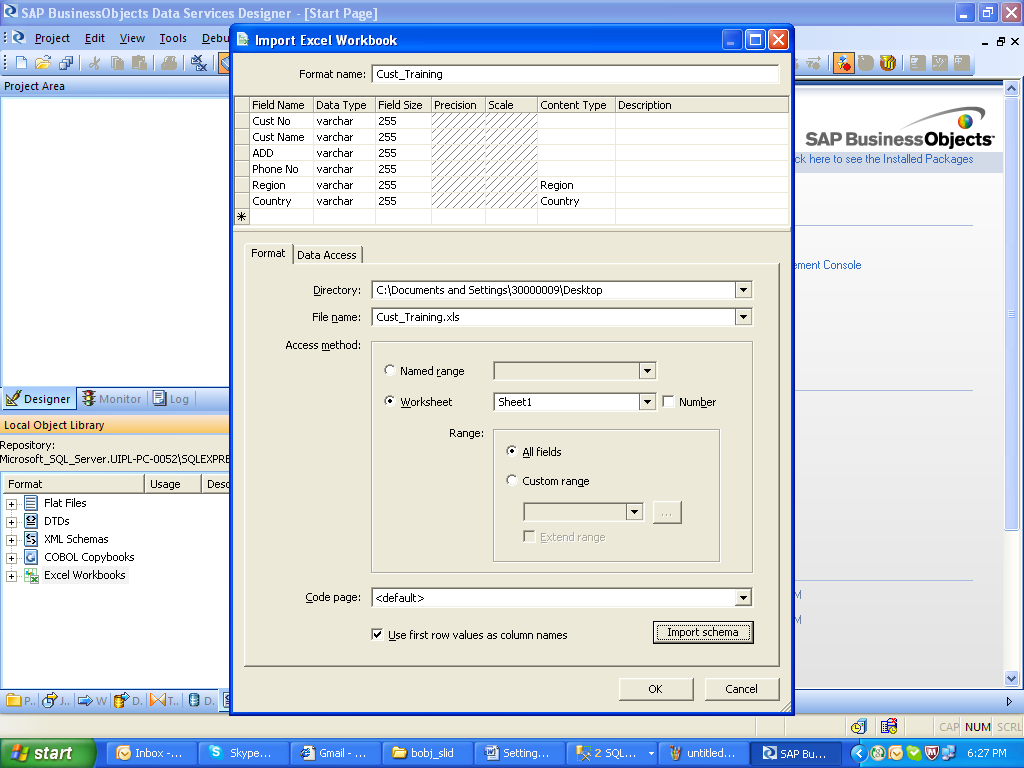 Go to File Format. Select Excel Work book. Right click →new
First select the Directory. Click on the Down arrow and navigate to your desk top.
Next using down arrow navigate and select the file that is saved on your desk top.
Copy the same name and past that in the format name.
Select worksheet and select the sheet 1 in which you have the data.
Next using down arrow navigate and select the file that is saved on your desk top.
Copy the same name and past that in the format name.
Select worksheet and select the sheet 1 in which you have the data.
Check First Row values as column n click on import schema button.
Now you can see the structure created on the top of the same screen.
Make sure that all the data type as Varchar 255 and click on OK.
Now you can see the structure created on the top of the same screen.
Make sure that all the data type as Varchar 255 and click on OK.
Now check that file should come under the Excel workbooks under the local object library.
Now we should create a project and start building a job so that we can extract the data
from the Spread sheet to data services and store that to SQL server DB.
from the Spread sheet to data services and store that to SQL server DB.
Moving the data from Excel to SQL
Just above the project Area you will find a new button.
Click on that to create a new project.
Give the project name and click on Ok.
Now you can see the project folder created under the Project area.
Select the project→ Right click → New Batch job.
Click on that to create a new project.
Give the project name and click on Ok.
Now you can see the project folder created under the Project area.
Select the project→ Right click → New Batch job.
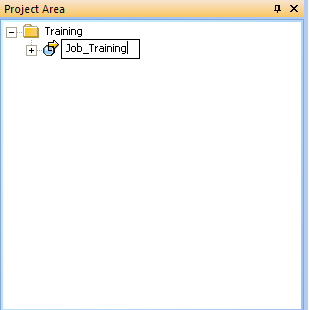
Give Job name. Now if you observe the canvas window will appear or it will be activated. In the canvas,
Click on the Work Flow on the right side pane and click on the canvas region to get a work flow and
name the work flow as WF_Training.
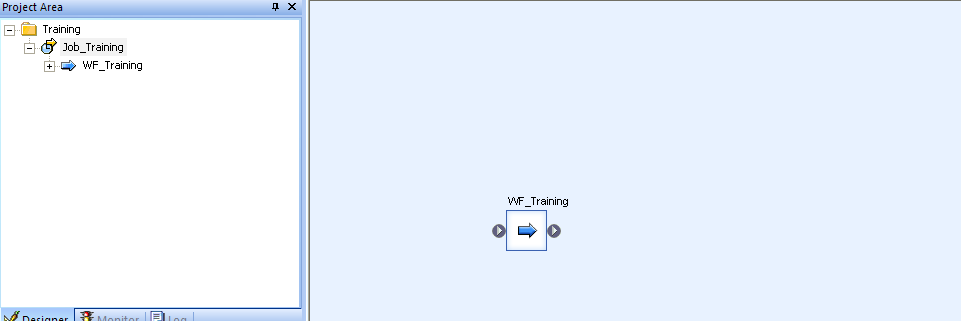
Double Click on the work flow and similarly get a dataflow in to it. If you now observe under the project area
you will find the job displayed as a tree structure.
you will find the job displayed as a tree structure.
See the below screen shots for the steps to do.
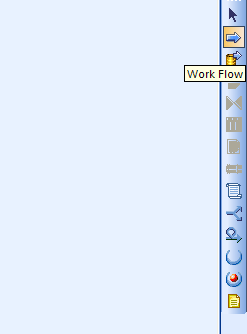
Double click on Work Flow and Click on Data flow on the right side pane and click back on canvas.

Double click on the Data flow.
This is the place where your actual process starts.
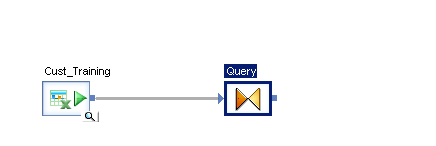
Drag the created flat file from the Excel workbooks to the designer window or canvas.
Click on the query transform from the right side pane and click it next to the spreadsheet dragged.
Connect the spread sheet to query transform.
Double click on the query and drag all the fields from schema In to Schema Out.
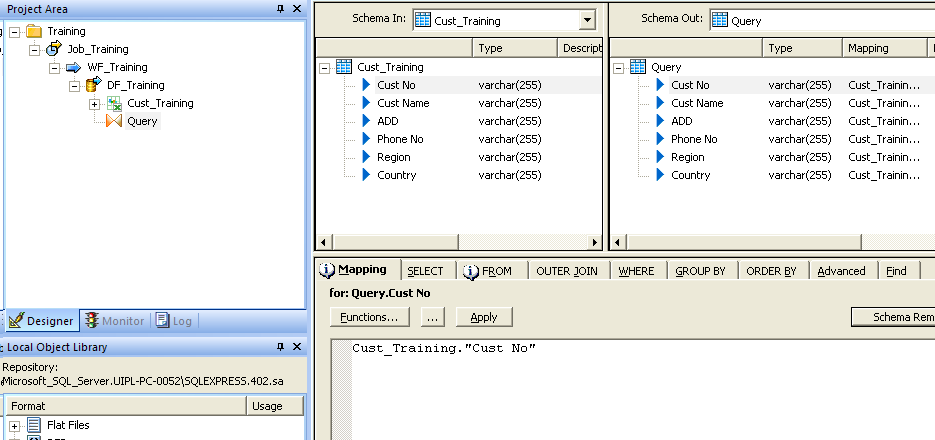
Click on back at the top of the window.
Now create a template table and point it to the data store you created to connect to SQL Server as below.
Click on the template table on the right side pane and click it back on the canvas.

Make sure that you select the data store you created using the down arrow. Click on OK.
Now your temp table will be created and now connect the query transformation to the temp table and
click on save.
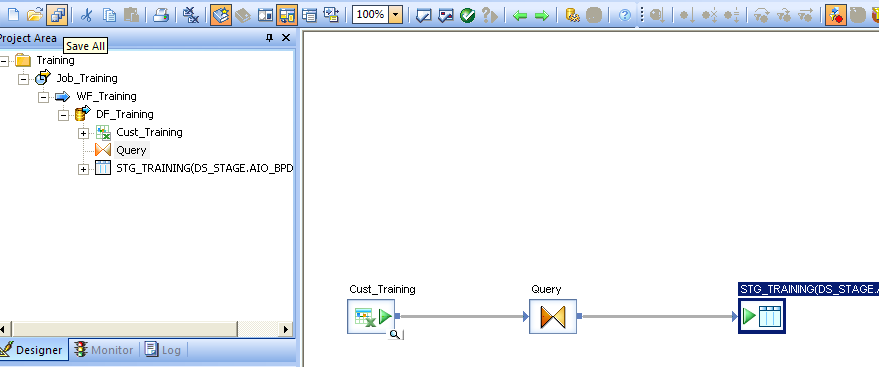
once you click on save the magnifying glass symbol will be shown at the right bottom of the temp tale and
it says that the table is saved with the structure or schema.
Now your job is ready and you can run the job, select the job you created “Job_Training”.
Right click and click on execute.
Right click and click on execute.
Now your job will run successfully.