
Setting up the central repository
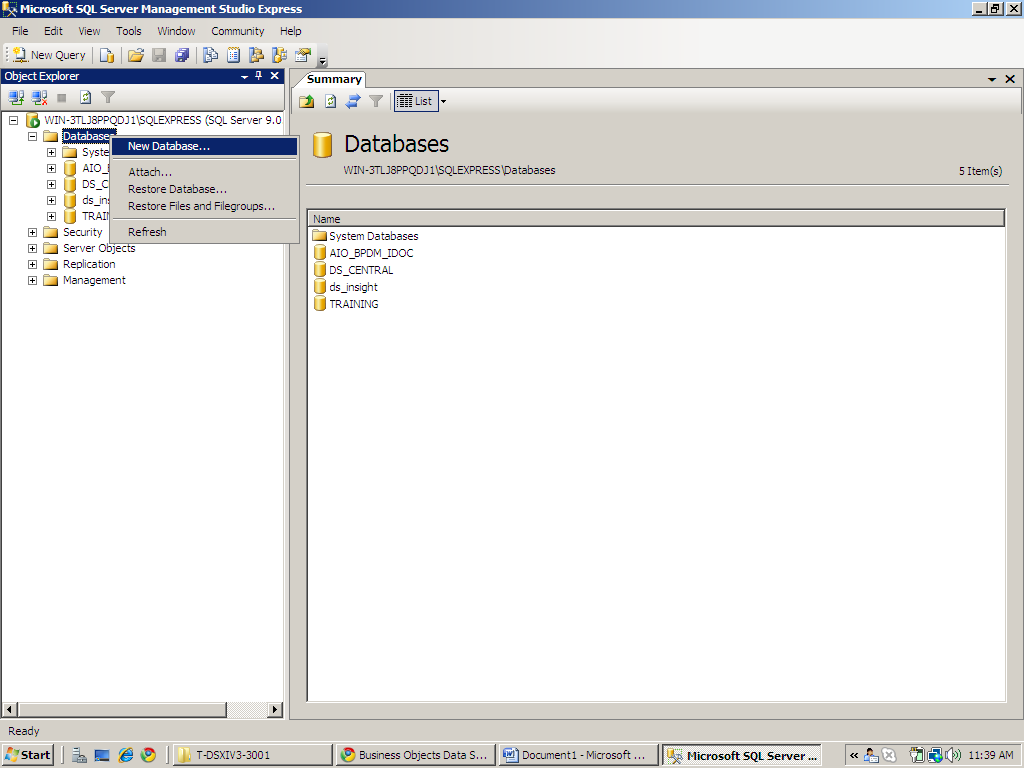
Create a DB in the SQL server
Create a Central Repository Using the Repository Manager
Login to designer and Add the Central repository
Upload a job from local repository to the central repository
1. Login to the SQL and create a local repository and create a DB “DB_CENTRAL”
1. Login to the SQL and create a local repository and create a DB “DB_CENTRAL”
See the below screenshots
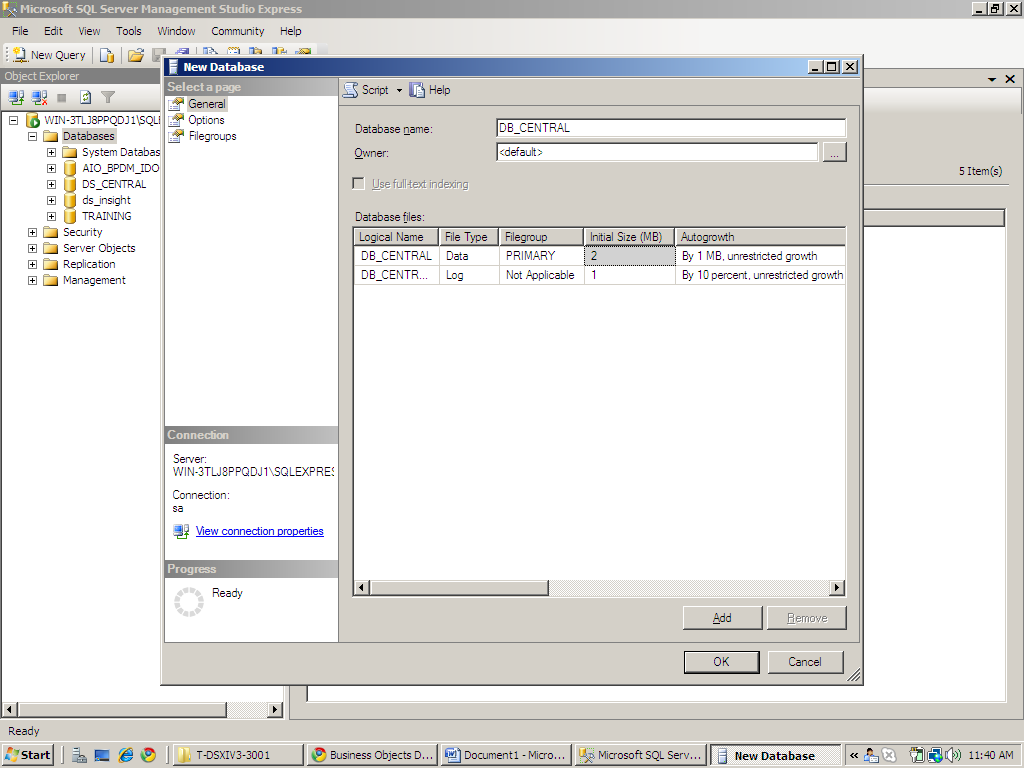
Click on ok
And your DB will be created. Find it on the right hand side of the screen

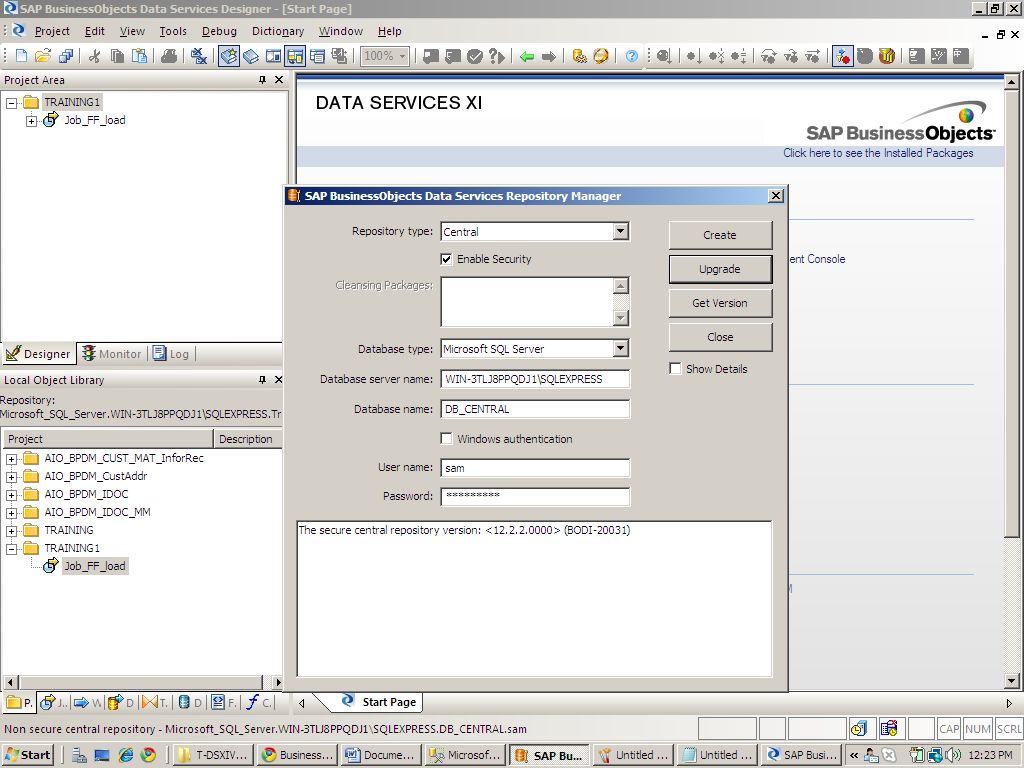
2. Creating a central Repository
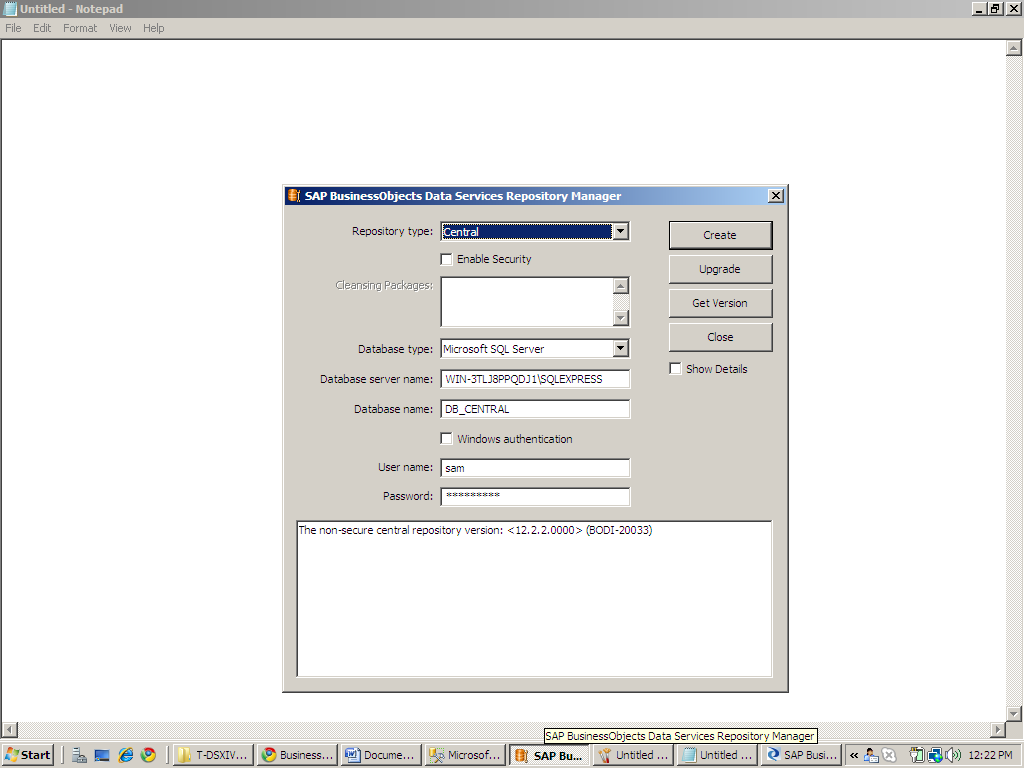
Go repository manager using the below navigation

Give the below credentials and click on create.
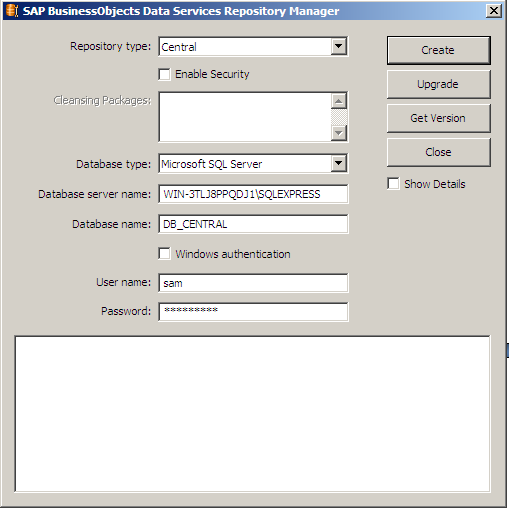
Select repository type as “Central”
Database type Micro soft SQL server
Server name “ sql server name”
Database “DB_CENTRAL”
User name and password.
Now the scripts will be run to create the repository tables and
you will find a message saying that the repository successfully created.
3. Now add the central repo to Designer.
you will find a message saying that the repository successfully created.
3. Now add the central repo to Designer.
Login to the Data services designer and login using the local repo credentials.
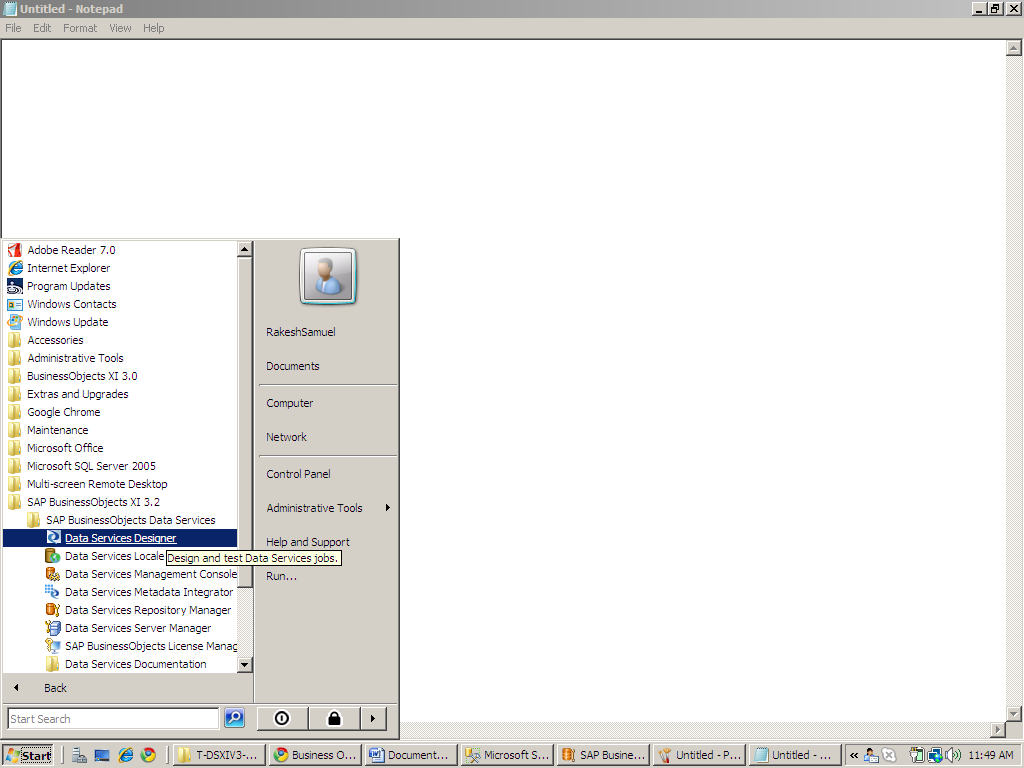
Login using the credentials mentioned in the earlier document

Once you are in the designer
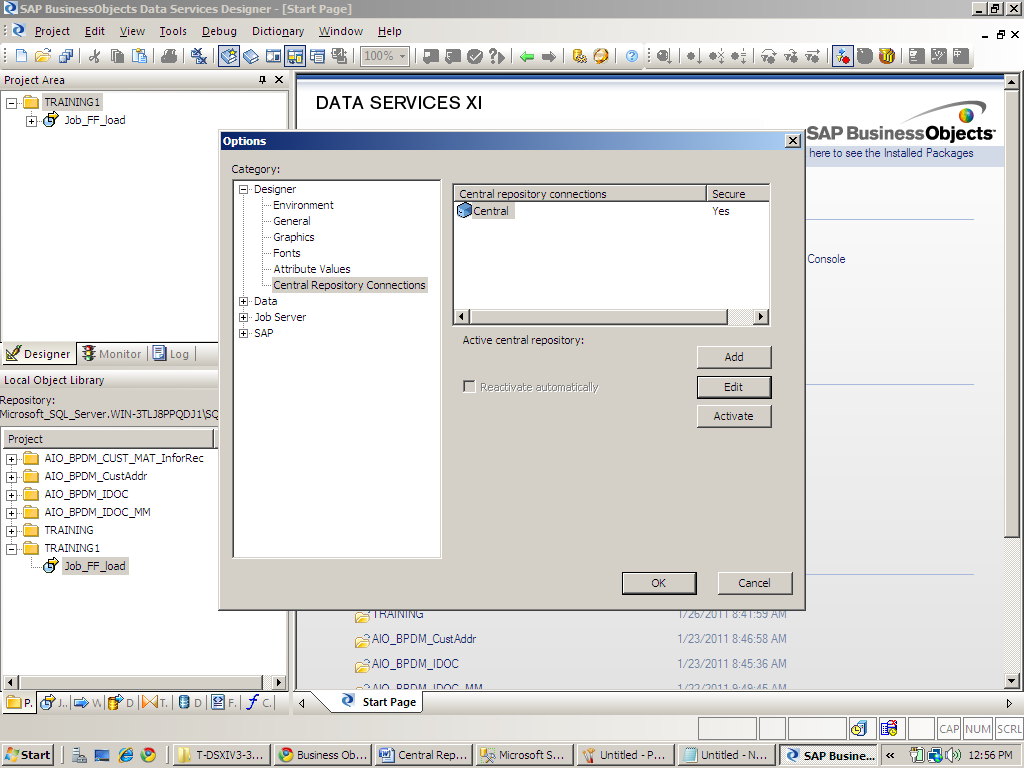
From menu bar “tools”→ Central repositories

Click on add on the right side selecting the Central repository connections on the left side
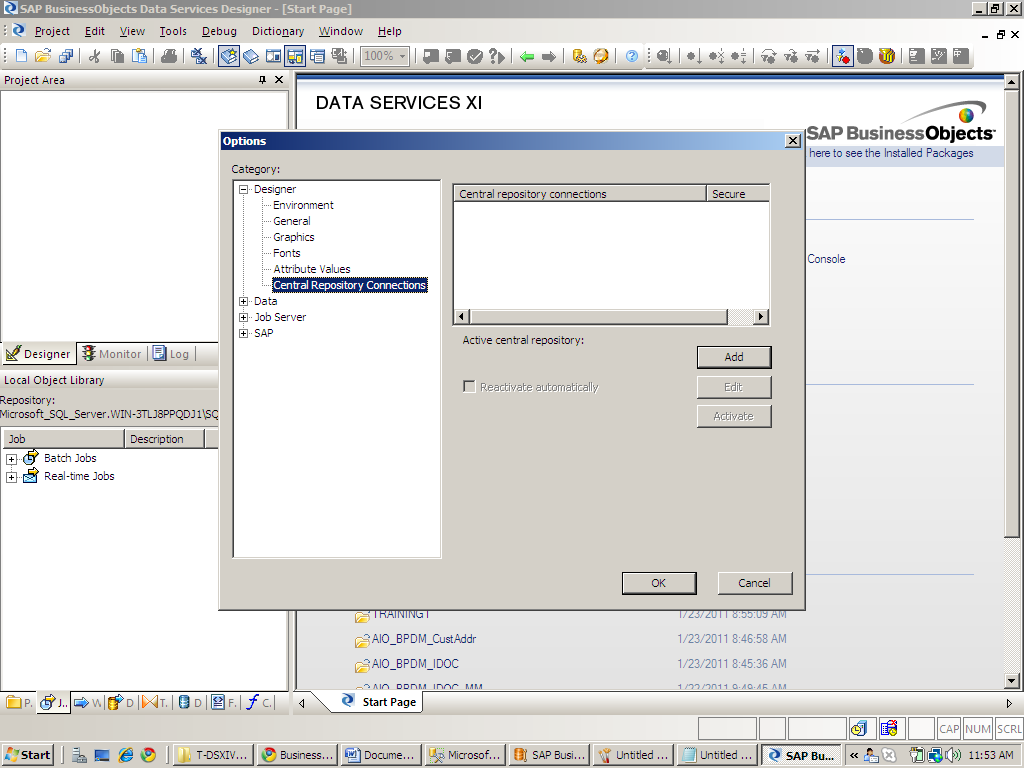
Give the central repo credentials and click on ok

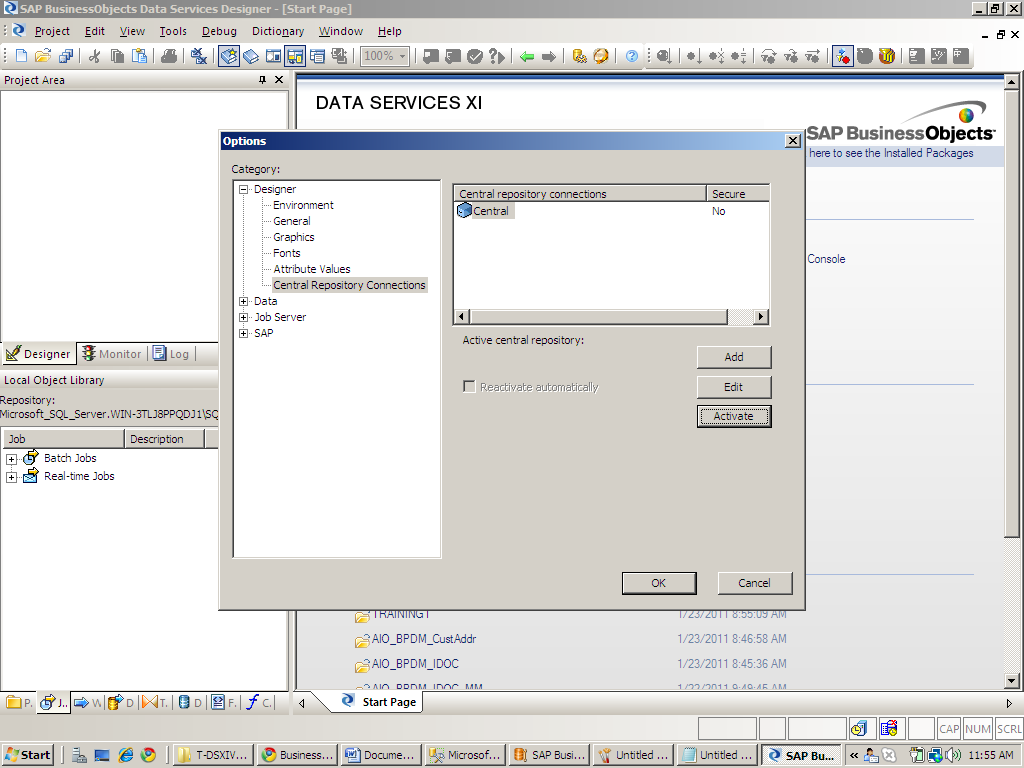
Now you will find the central repo added to the repository connections
Select the repository and click on Activate.
Now your Central repo is active & ready to add your contents from the local object library to central.
Before we do add, just wanted to update that we can add the below artifacts of Data services to
the central repo Jobs
1.Work flows
2.Data flows
3.Data stores and Functions
Now go to the local object library and select the job, right click and add it to the central repository
the central repo Jobs
1.Work flows
2.Data flows
3.Data stores and Functions
Now go to the local object library and select the job, right click and add it to the central repository
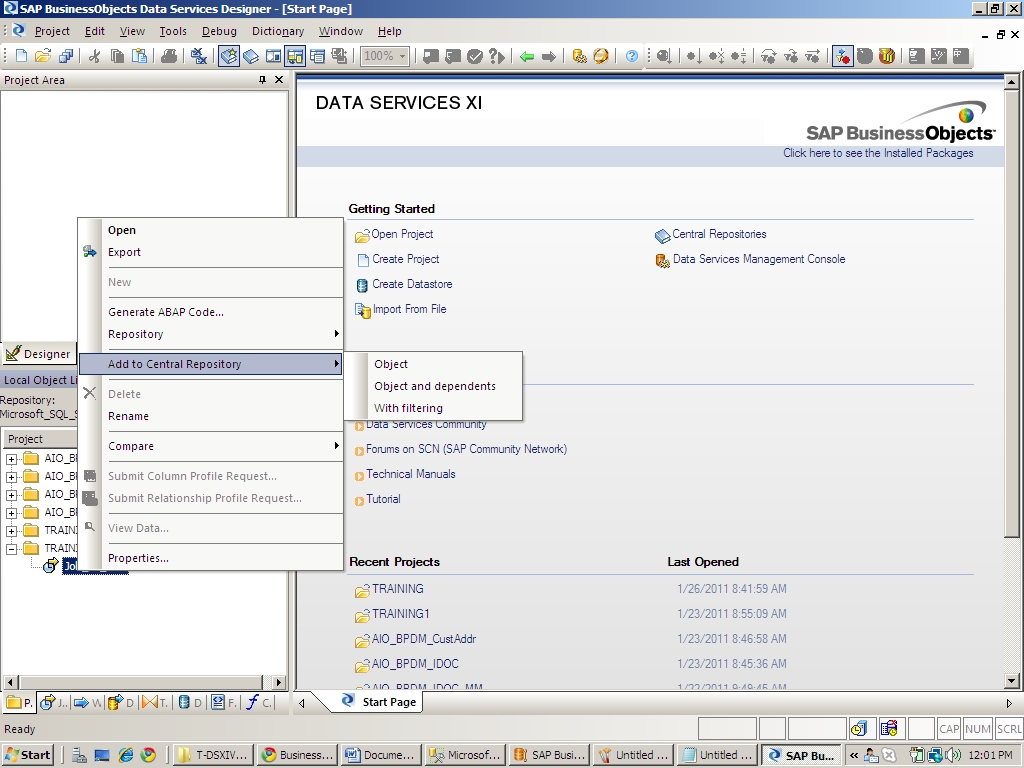
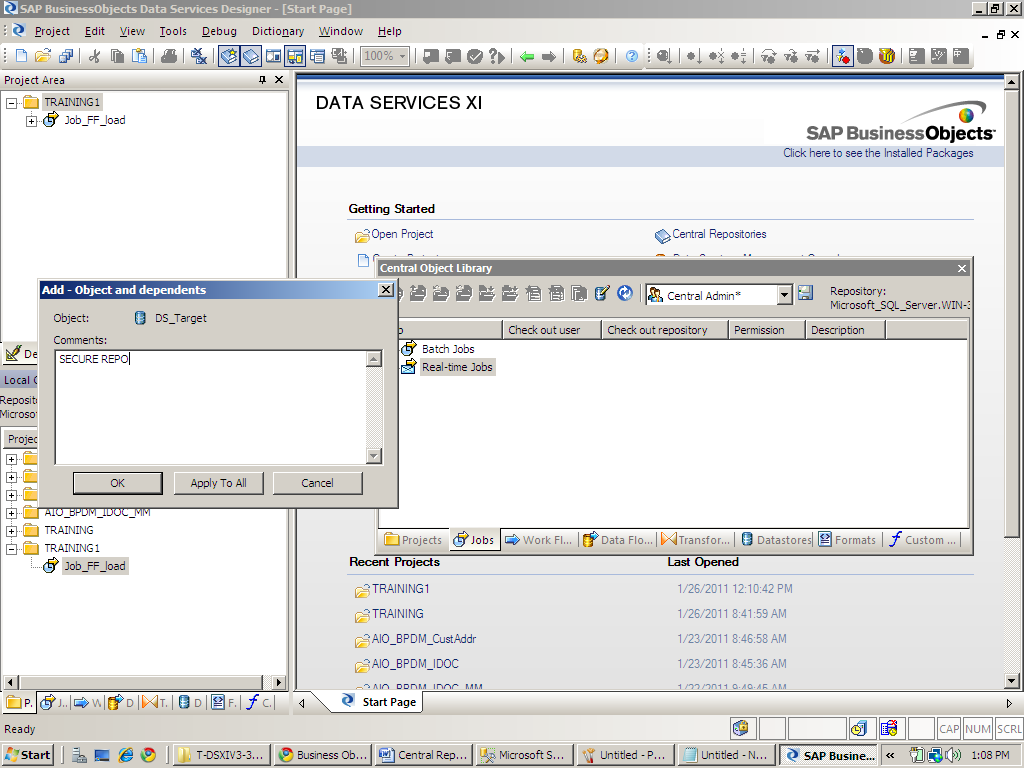
Select objects & dependents to add the job & all the components of the jobs to central repository.
You can also add the dataflow and work flows and also the data stores to the central repository.
Once you select objects and dependents the below screen will come.
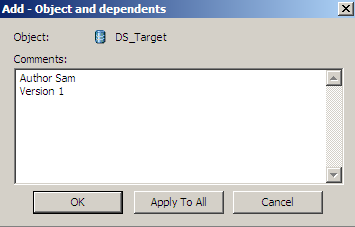
Give the comments and click on apply to all
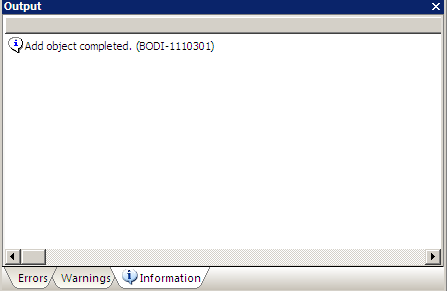
Now you will get this message saying that your job is added.
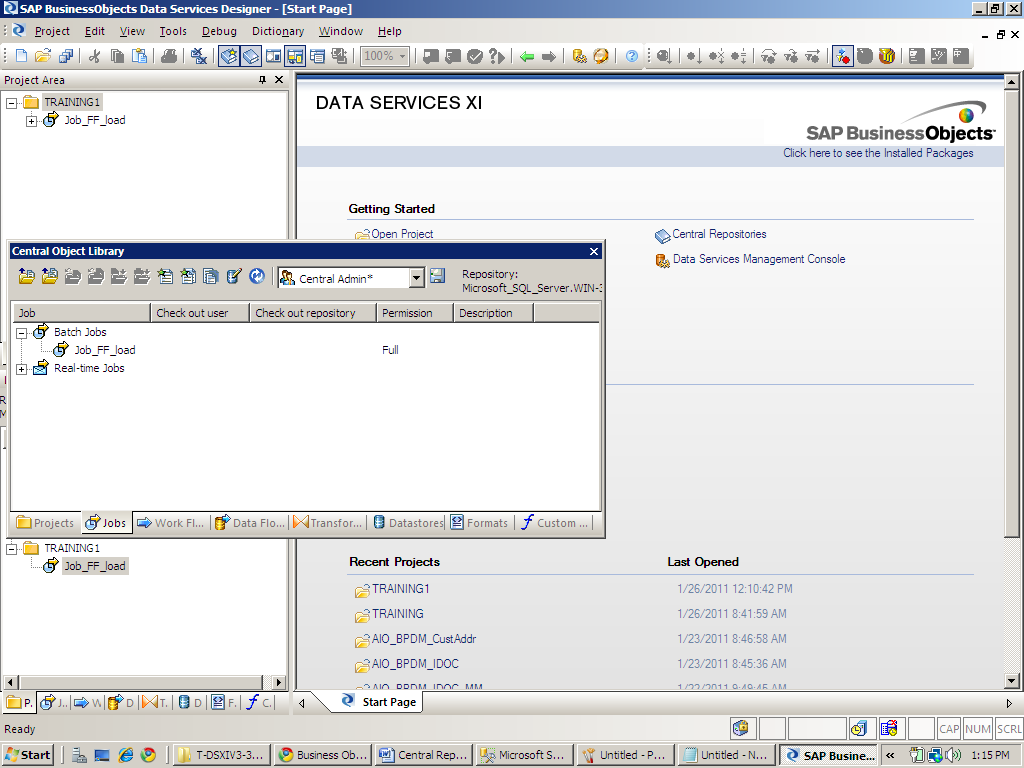
Now go to central repo and check the job and its components.
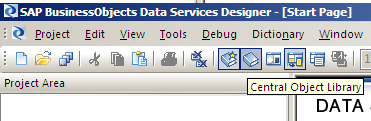
you will find central repo button active on the screen. Click on the Central object library.
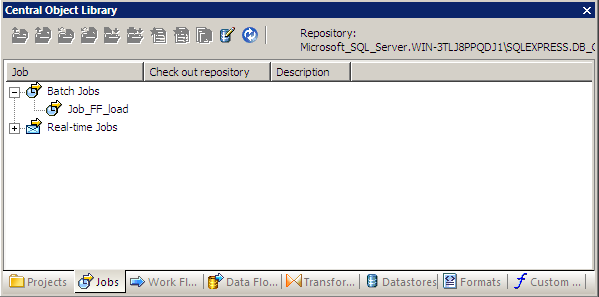
Go thru the tabs work flow, data flow and data store to check if your components are added or not.
How to demonstrate that central object library support the multiple user instance
Add central repository to the management console under the repositories
Add the user Group and users
Login to the designer with the new user name
Get the job from the central repo.
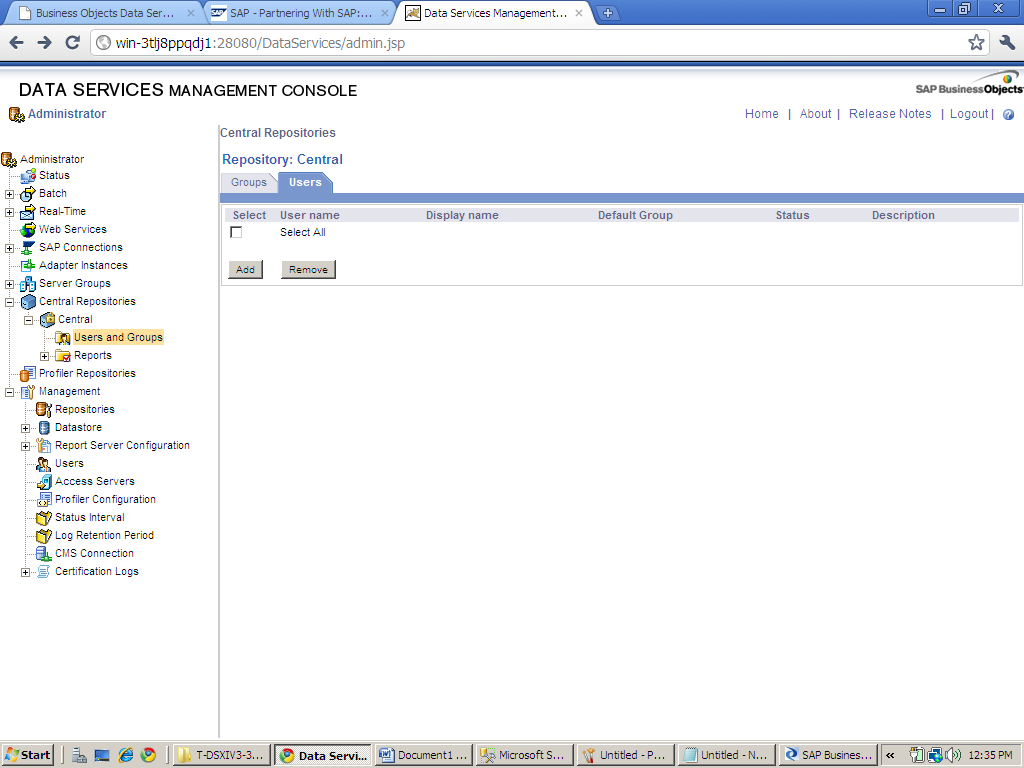
Adding the Central repository to the Management Console
To add a central repository to the management console, the repository should be secure
Now go the repository manager & give the same central repository credentials,
Before, you check the get version button and it will say it’s a non secure
Check the Enable security check box and click on upgrade.
Now your central repo is upgrade with the security
Now go to management console and add the central repository
Login to management console using the user id and password “admin”

Click on administrator
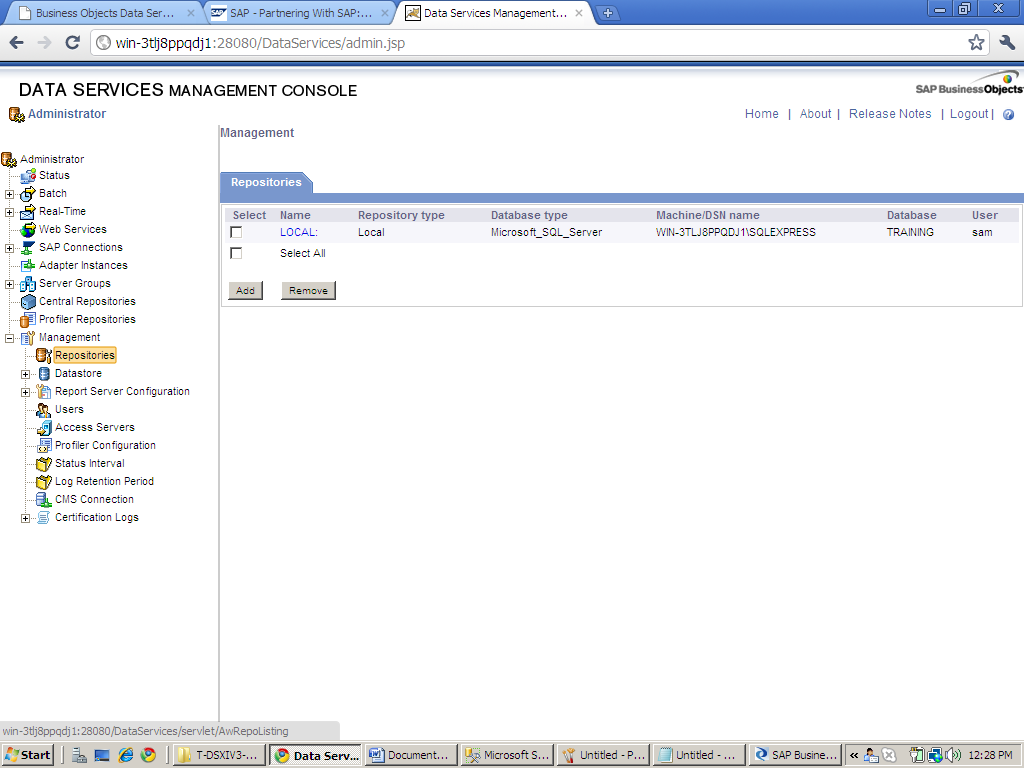
Select the repositories under the management and click add on the right side.

Give the credentials and click on test to check the connection.
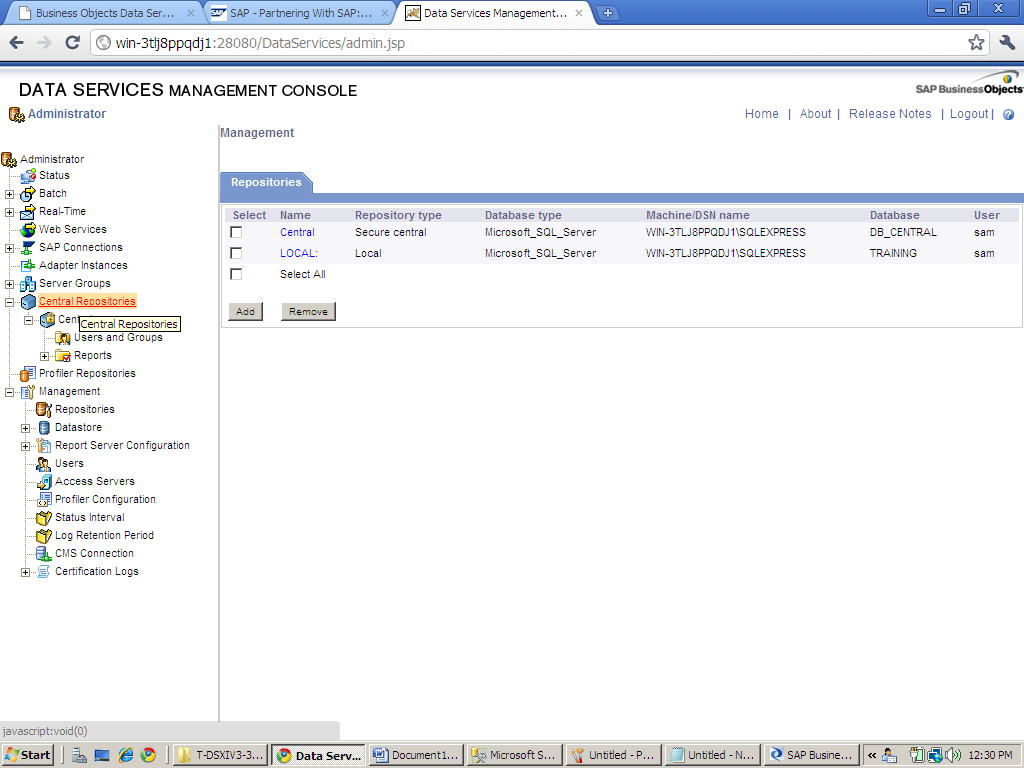
Click on apply. Now you can find the Central repository active on the left side and expand it to see
Users and Groups and reports under it.
Users and Groups and reports under it.
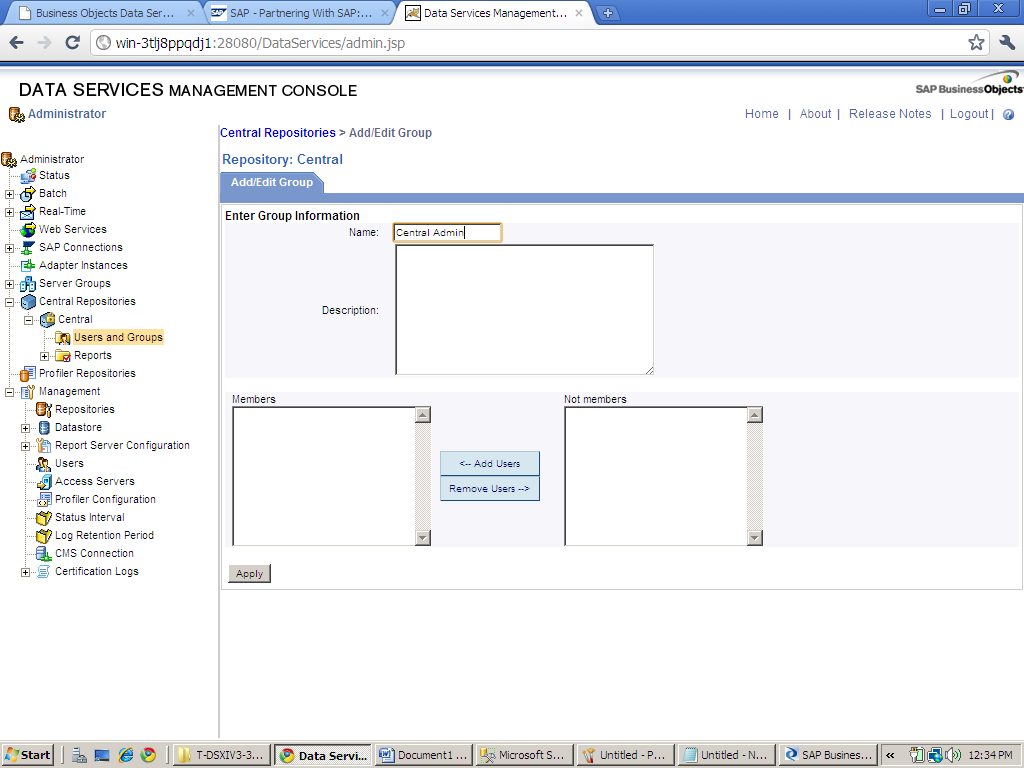
Click on the users and groups & click on add on the right side to add a group“ Central Administrator”
Give the name “ Central Admin” and click on apply. Similarly add the group developers
click on the users

Click on ADD to add the users

Give the user credentials and you can select the default group to the central admin or developers.
Click on apply.
Similarly create another User ash and add it to the developers group or to both the groups and
click on apply.
Similarly create another User ash and add it to the developers group or to both the groups and
click on apply.

All the users of one particular group will get the roles assigned to it.
Now go back to the designer.
Tools→ central repository, Select the central repo and de activate. Click on edit
Click on secure and click on the read security key and select the key generated when you applied
security to the central repo (You can identify with the DB name)
security to the central repo (You can identify with the DB name)
Give the user name and password which you created when u created users in management console
Click on ok and activate the repository again
Now you assigned security to the central repository and assigned a new user and user groups too
Now go back to the central object library and you can’t find any jobs there.
Add a job

Right click the job and add to the central repo with objects and dependants and click give a comment
and apply to all
Now you can see the permission full next to the job
Click on the drop down next to the central admin and select developers group,
you can see the change in the permission
you can see the change in the permission

Now you can check out to lock the job or components of the job so that even if any person add the
same job to the central repository it will not be over written. Once the final version is done you can
again check in.
To check in and checkout you can right click on the job or components in the central repository.
same job to the central repository it will not be over written. Once the final version is done you can
again check in.
To check in and checkout you can right click on the job or components in the central repository.
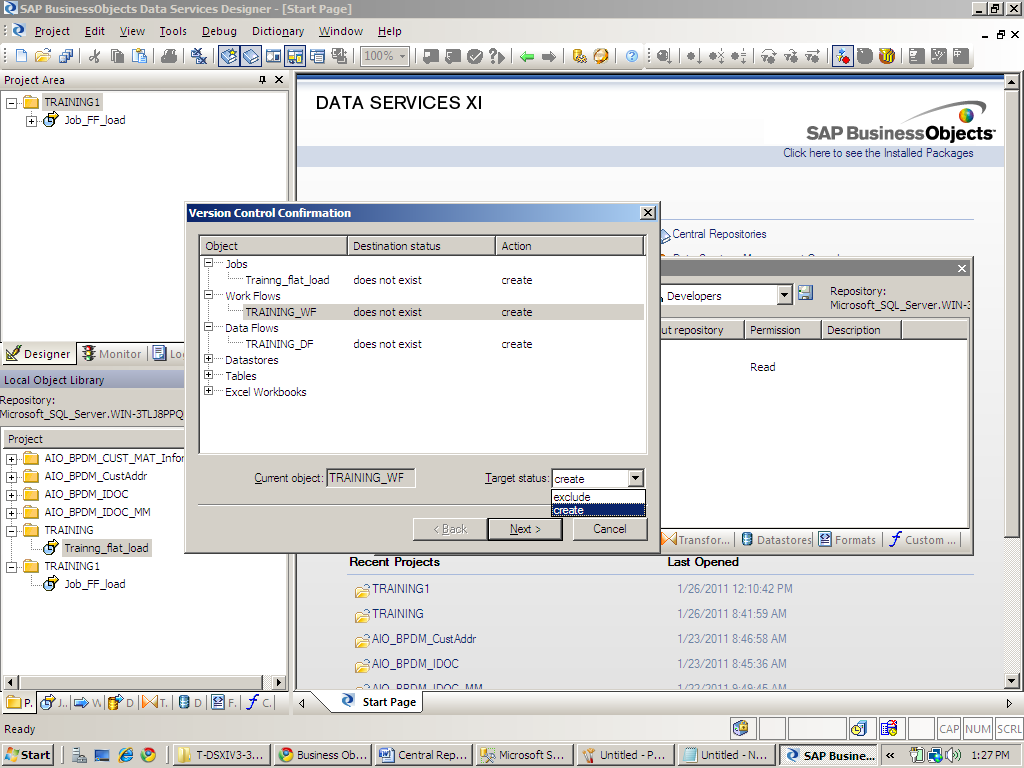
Also when you add the job in to the central repo you can go with filtering.
Right click the job in the local object repo → add to central repo→ with filters.
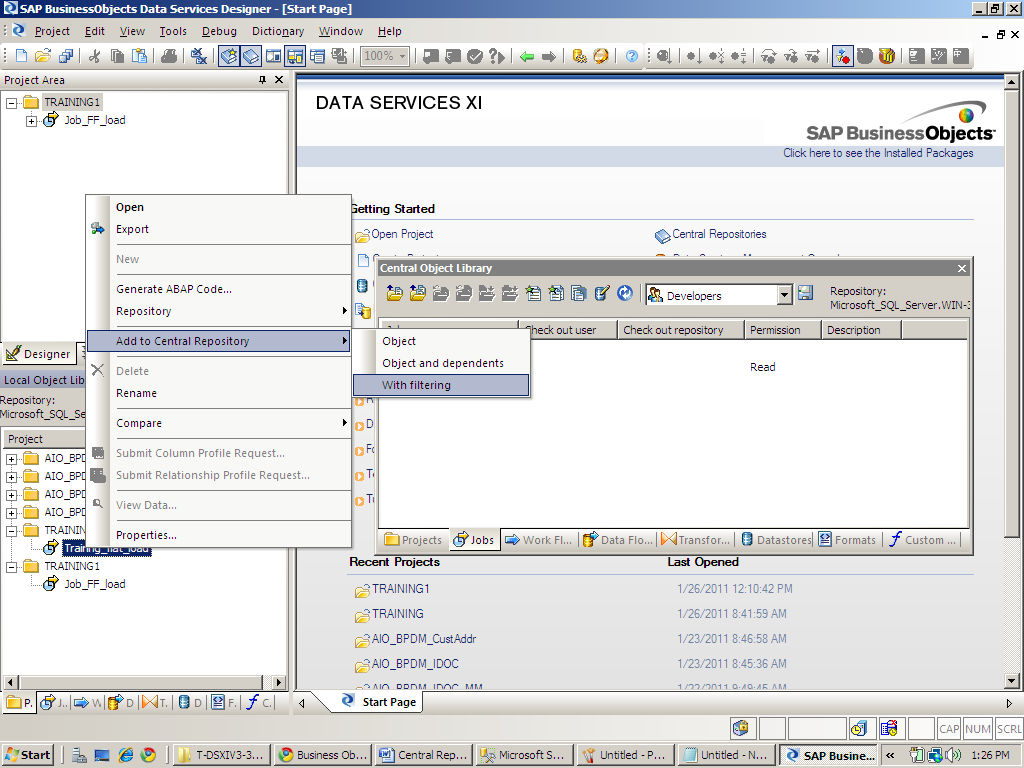
This will give you the destination status and action to be taken when you upload the job to the central
repository. You can exclude creation using the target status button as below
repository. You can exclude creation using the target status button as below
You can also compare the job in the local repo to the central repo and vice versa so that you can
check if both are of the different versions or any changes did in the job.
check if both are of the different versions or any changes did in the job.
This concludes the central repository, administration and check in and checkouts